No-Sew Hair-Bow
No-Sew Hair-bow
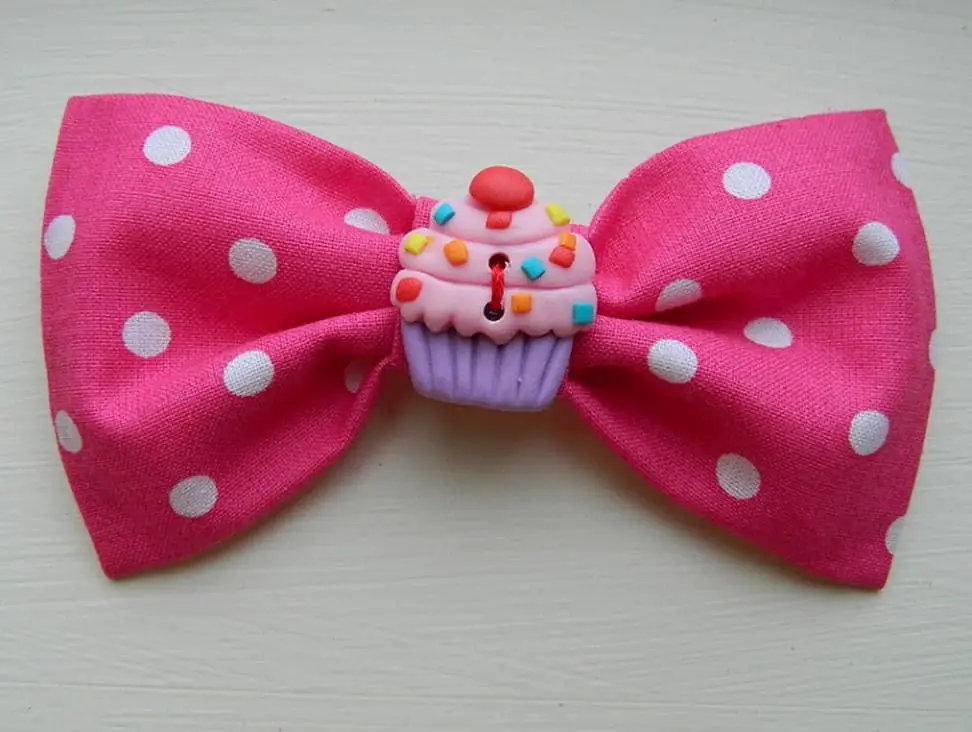
I’ve tried out a few different tutorials for hair-bows and they’re either hopelessly confusing or involve a lot of intricate hand sewing. Through trial and error I’ve found my own method to make them.. with no sewing at all! I put together an easy, numbered, step-by-step tutorial with tons of photos so you can make your own!
…..
Supplies:
Fabric – at least a quarter of a yard
Fabric glue
Hair clip – found at most craft stores
Hot glue gun
Scissors
Optional items:
Button
Embroidery thread
For this hair-bow you’ll need to cut out two pieces. Piece A will be your bow and Piece B will be the section of fabric in the middle that cinches your bow together.
Piece A = 5 ½” by 5 ½”
Piece B = 3″ by 2″
(1.) On Piece B, back of the fabric facing up, fold over the side that measures 3 inches, by a centimeter. Fold opposing side over so it overlaps your first fold. Crease with your finger. (2.) Put a small line of glue on the piece that will go underneath, (3.) fold 2nd side over and lightly press together. (4.) Set aside to dry.
(5.) On Piece A, with back of fabric facing up, fold one side over by a centimeter to make a seam, and crease with your finger. (6.) Put a thin line of fabric glue in the crease and lightly press down. (7.) Repeat on opposite side. (8.) Set aside to dry for about 10 minutes.
(9.) Next, fold over raw edge on Piece A about an inch to 1 ½ inches. Put a small line of glue on both outer edges and press down. (10.) This will create a little pocket or envelope look. (11.) Fold over opposing side so it slightly overlaps and crease. Place a line of glue on outer edges and where fabric will overlap. (12.) Press down and let dry for 15 minutes.
(13.) Once dry, pinch Piece A in the middle to get a nice bow shape. (14.) Take Piece B and wrap it around where you’ve pinched. Make sure the end of Piece B ends at the back where the seams of the bow are. (15.) Place a small line of glue where it first overlaps, (16.) and then another dab at the end once you’ve wrapped it around.
The next part is how you can trick everyone into thinking you actually sewed this all together! (17.) Cut off about 1 ½ to 2 inches of embroidery thread and feed it through the button holes. (18.) Tie it in a knot behind the button and snip off extra thread. The embroidery thread is made up of 6 strands of regular thread so it makes it look like you took the time to stitch the button on! (19.) Put a good sized dab of hot glue on the front band of the bow, (20.) place your button down and hold for 20-30 seconds.
Next flip your bow over and determine how you want to attach your hair clip. I like to put a line of hot glue on the top inside of my clip and then clip it right onto the band of the bow so it stays on securely. It also prevents the teeth of the clip from making a mark in my hair after I’m done wearing it.
And you’re done! Now you have an adorable, custom designed, no-sew hair-bow! So cute that your boyfriend might just use it as a clip on bowtie…. Haha
Looking for some cute hair-bows and hair accessories for your little one? Check out my friend Stephanie’s Etsy store! She’s featuring a back-to-school %40 off everything sale! Get them before they’re gone!

