20+ Easy Hairstyle for Wet Hair Overnight (2023 Update)
Whether you want to save some time in the morning or simply don’t like using heating tools, there are lots of fantastic yet easy ways to style your wet hair. Now we don’t recommend going out with wet hair regularly, but sometimes there’s no other option. Whether you’re going to work, run out of time before a night out or just want some casual to run errands, here are some easy hairstyles for wet hair you can recreate at home.
Easy Hairstyle for Wet Hair
Dual Buns


If you want something easy, fast, and convenient, dual buns (sometimes known as space buns) are a fantastic option. Grab your wet hair, then gently divide it into two sections. This look doesn’t have to be precise, ideal for those mornings where you press snooze too much. Twist each section into opposing directions, then fold each into a bun. Secure each bun loosely with elastics or bobby pins.
This style can be done overnight if you fasten them tight enough. When you wake up, you will just have to loosen the buns and add texturizing spray.
Messy Chignon
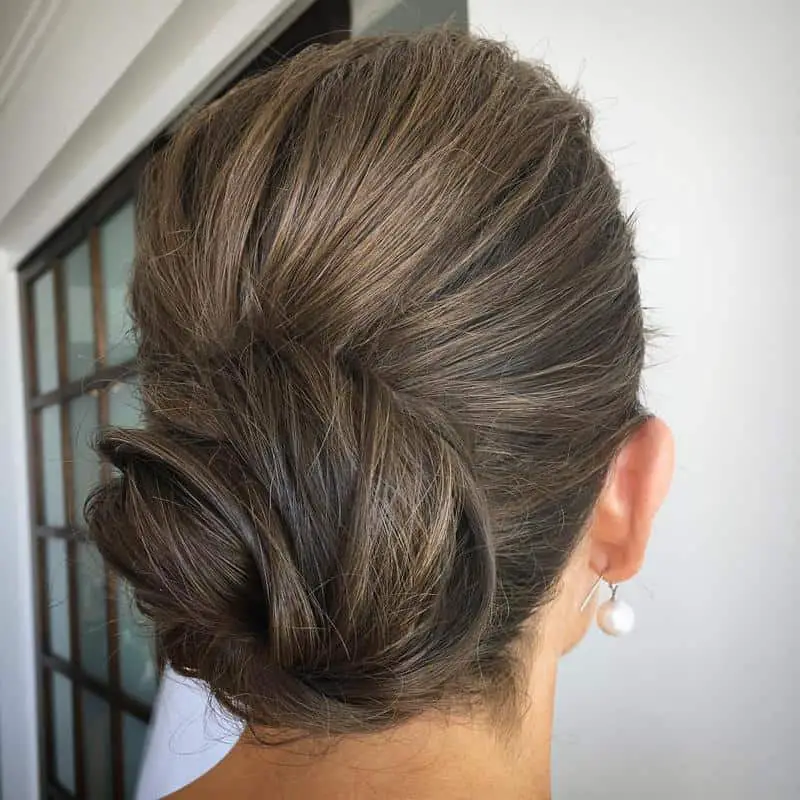
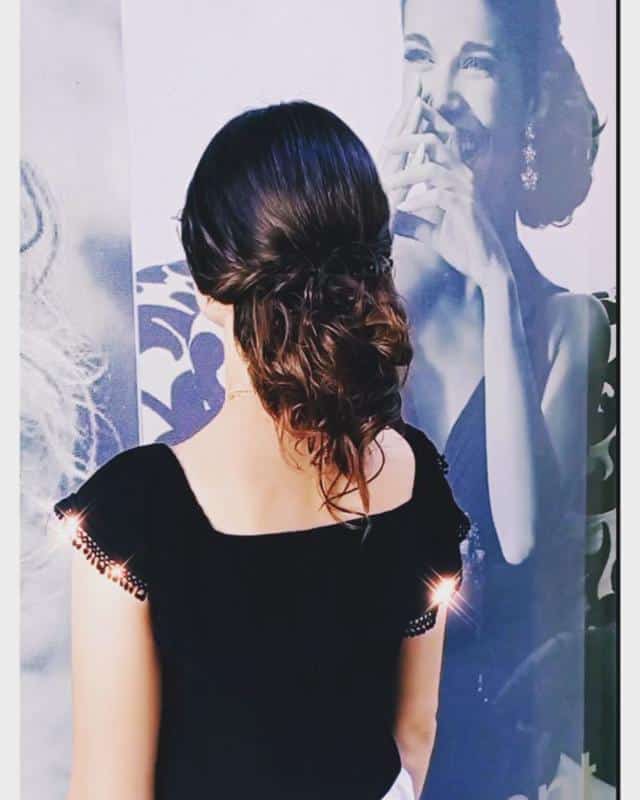
A chignon is the cool girls sophisticated yet easy hair hack. Towel dry your hair instead of combing it to keep that textured look. If you have flat, straight hair, run a texturizing product through your hair with your fingertips. Create an extreme side parting and pull your hair into a chignon. Low side buns are the coolest way of doing this trend. This video explains the process well.
Did you know:
Resist the urge to create high buns with wet hair. Tying your hair up when it’s wet is guaranteed to cause damage. Instead, keep your hairstyles low, like this chignon at the nape of the neck.
High Ponytail
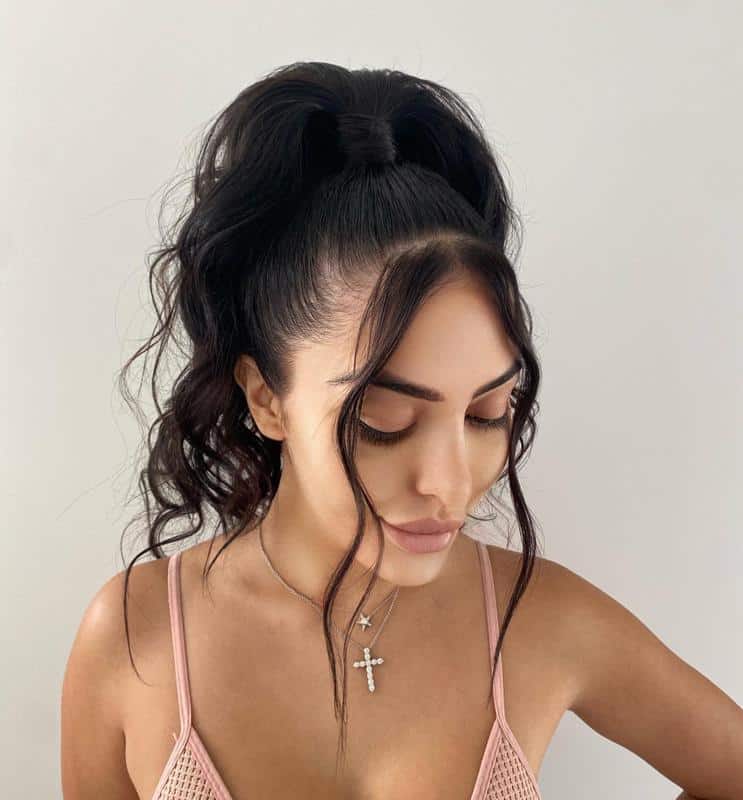
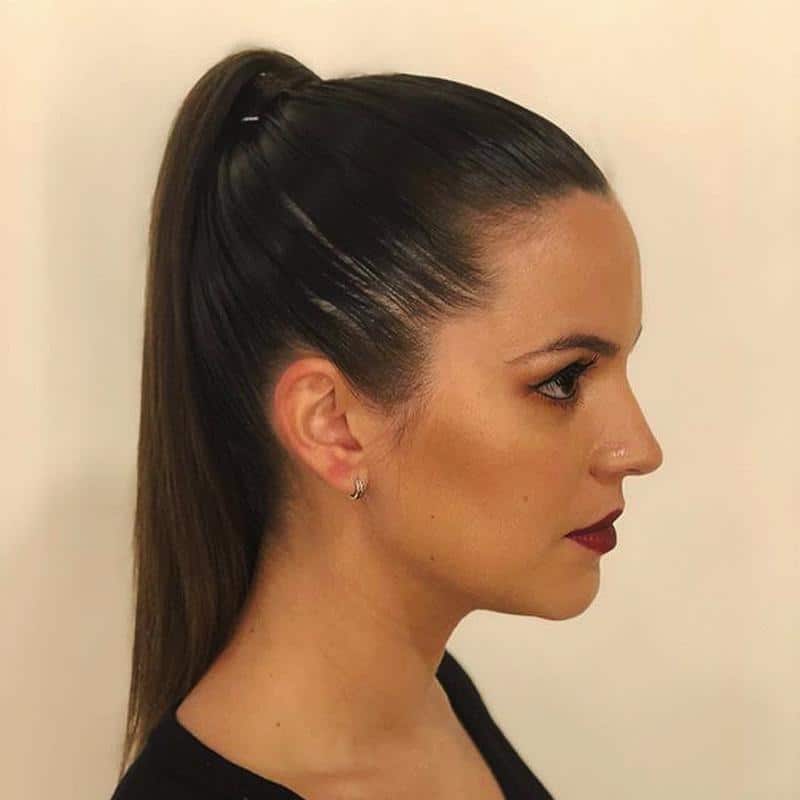
A signature of Ariana Grande, you’ll feel powerful walking to work with a sleek high pony. Start by packing all your hair onto the crown of the head, ensuring no strands are left out. Get rid of the lumps and bumps by gently combing your hair with a rat-tail comb. Smooth out your hair by gently running the comb teeth over the hair.
You may notice comb marks on your wet hair, use the palm of your hand to gently rub the marks off. If you have especially temperamental hair, use a light hold gel. We do advise only occasionally doing this hairstyle, high, tight styles can cause breakage on wet hair.
Although this style is easy, this video has some fantastic tips and tricks.
Also Read: Top 40 Elegant Messy Ponytail Hairstyles (2022 Updated)
Headband Tuck
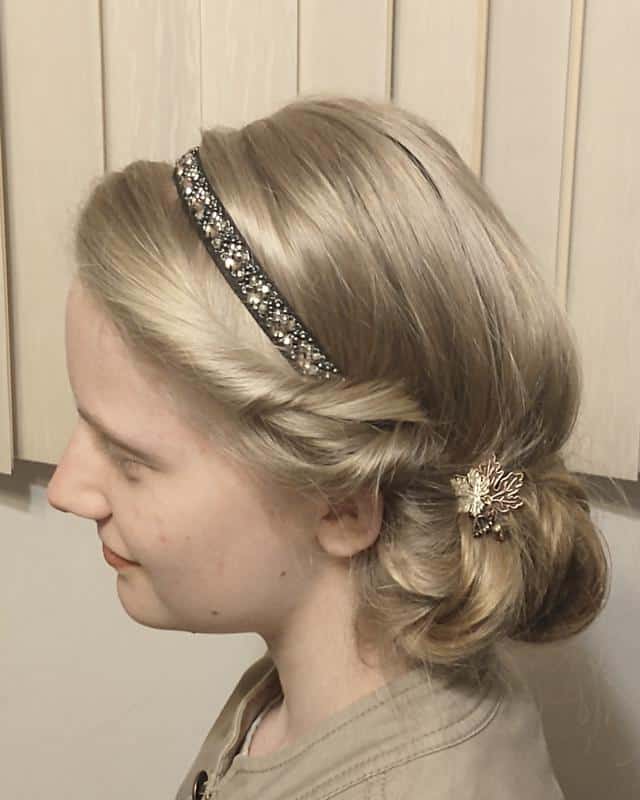
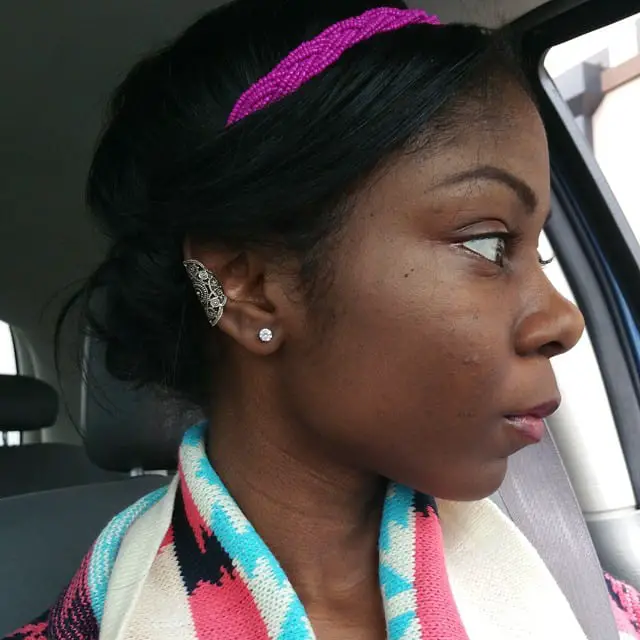
Naturally part your hair and ensure there are no stray hairs. Shake your hands through the ends to give your hair some natural texture and break up any pieces stuck together. You can add mousse through the middle and ends if you want texture.
Place an elastic headband over your hair. Wrap and tuck the ends of your hair into the headband. Take small sections of your hair and wrap them over the headband, tucking them into the elastic. Tucks don’t have to be even; in fact, it can look better when loose. We recommend starting from the center and working your way towards your ears.
We know this sounds complicated, check out this video to see how easy it actually is!
Did you know:
If your wet hair is too short to fully tuck into the headband, use bobby pins to secure any loose pieces of hair.
Slicked Back Short Wet Hair
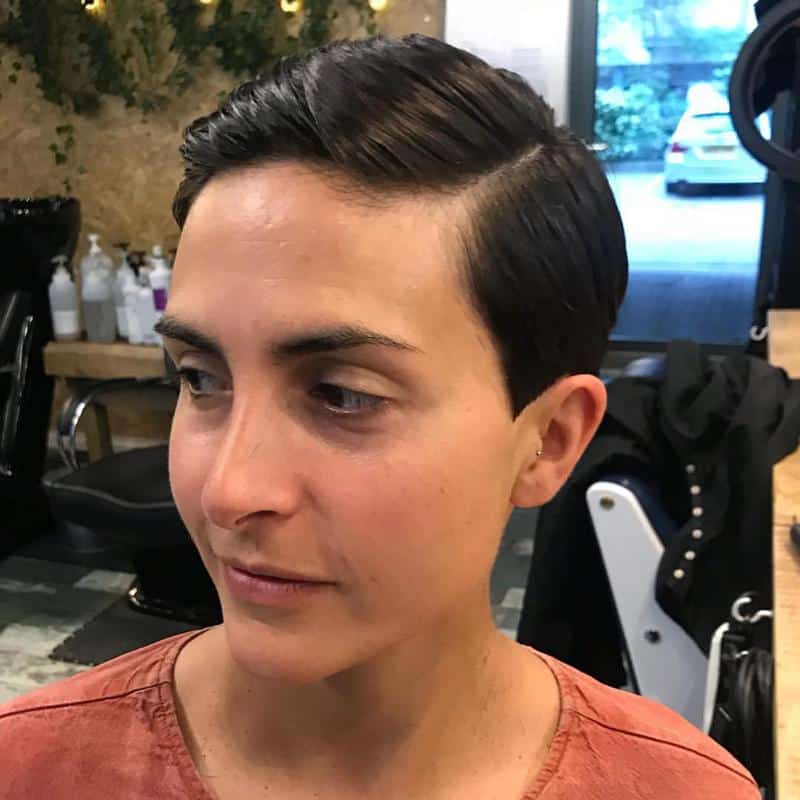

Shorter hair is much easier to style wet. On the days you don’t have the time or inclination to dry and style your hair, simply slick it back. Gently towel dry your hair, comb it for texture or use a texturizing spray, and sleek it off your face with a product. You can sleek it back for a mini pompadour or to the sides for a sleeker look. It’s as easy as that and looks absolutely stunning!
Easy Hairstyles for Wet Hair Overnight
Pineappling Wet Hair
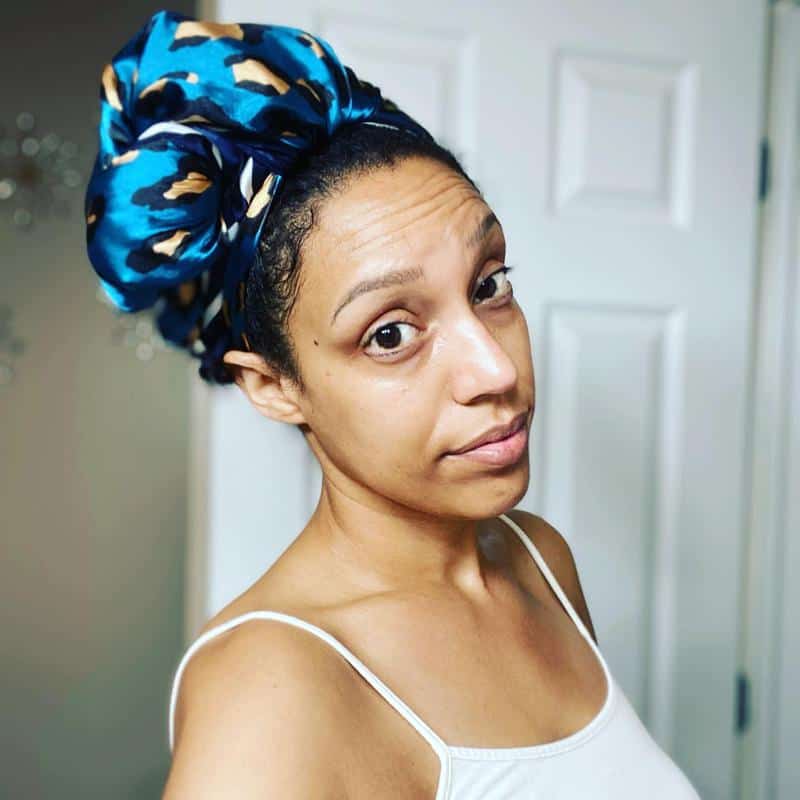
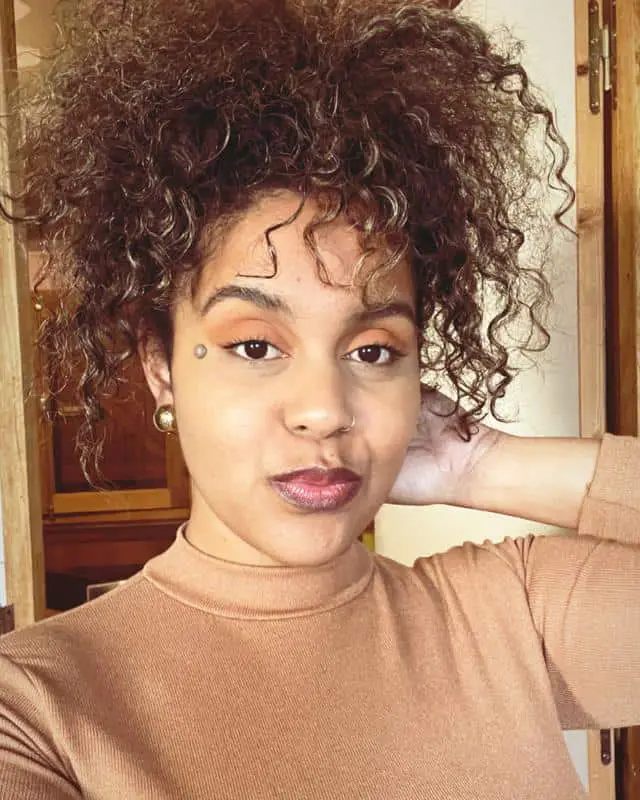
Pineappling your hair is the best way to protect your curls as you sleep. You can easily get a pile of curly hair on top of your head, when done right. It’s a simple method, put your hair in a high loose ponytail when wet or dry, and secure it on top of your head. The curls should stick out the top of your head, creating a pineapple look. When you wake up, you should have a unique curly look.
Did you know:
You may want to add a clip to your hair or wear a sleep cap. A satin or silk scrunchie or sleep cap with help reduce friction and keep your curls smooth.
Retro Waves
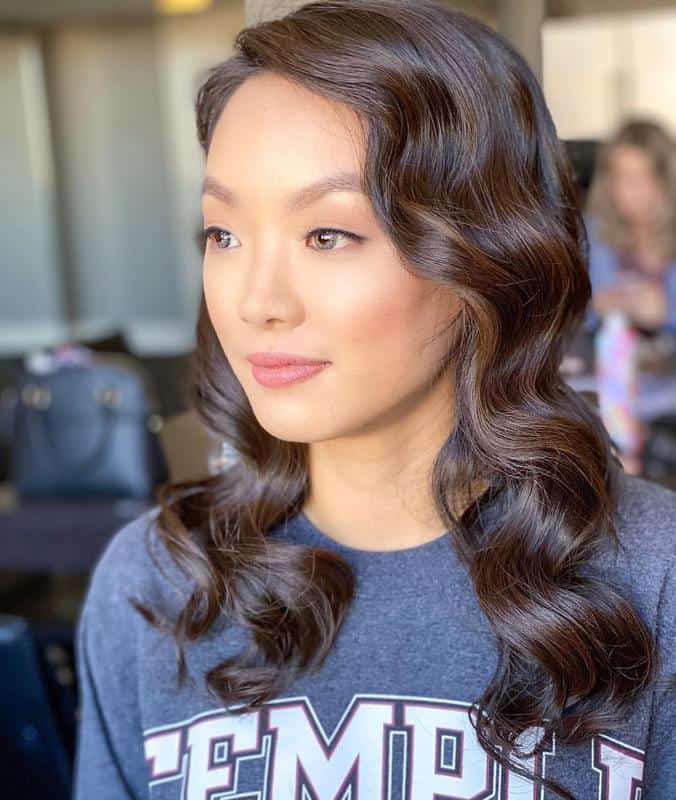
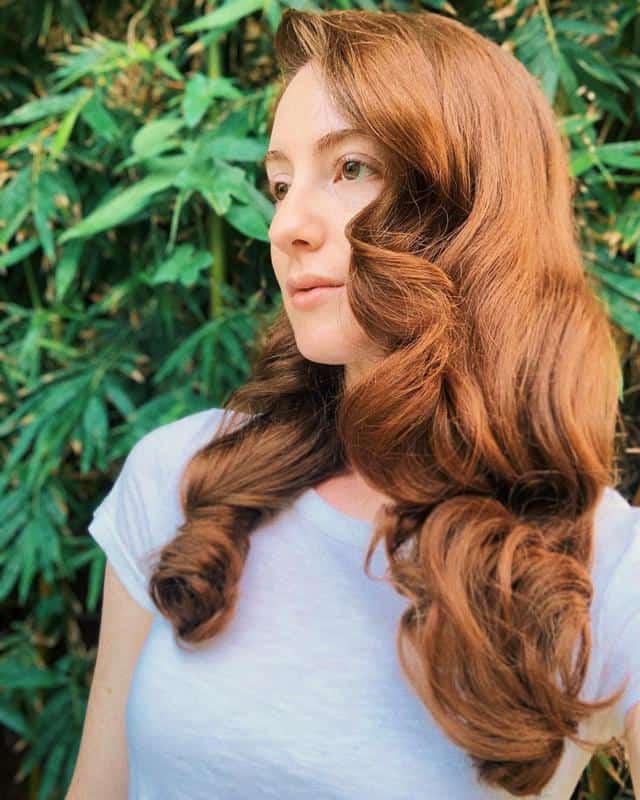
Have a big event tomorrow, but don’t want to get up early and dry your hair. Get these stunning old Hollywood waves without a single heat tool. This look has long been achieved by using bobby pins, Velcro rollers or sponge rollers. Add styling cream to damp hair to get that long lasting hold before applying the rollers.
Start with the area that is closest to your forehead, dividing the hair into sections. Roll your hair from the ends unto itself and clip on the underside. This video fully explains how to pin curl your hair with ease. Cover your hair with a satin bonnet or sleep on a silk pillowcase to ensure your hair stays sleek.
Bantu Knots
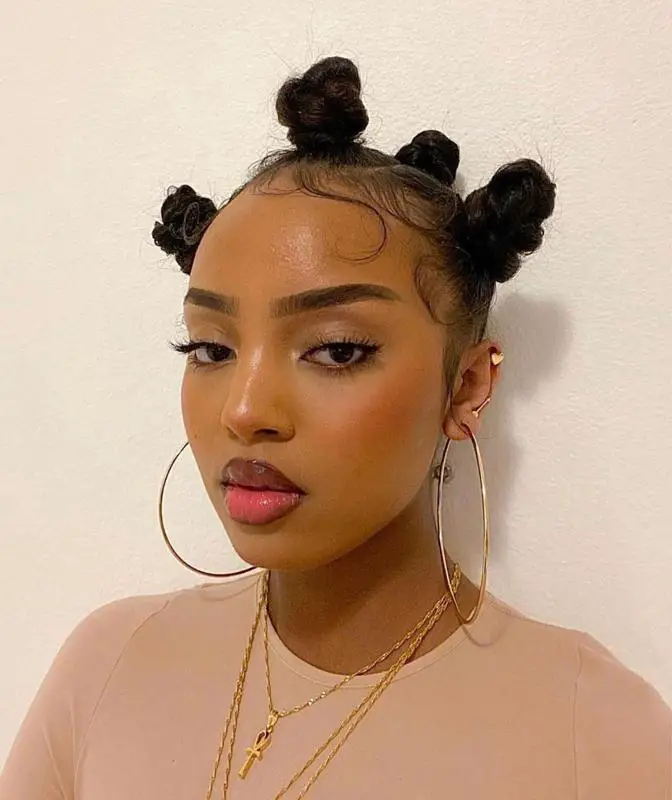
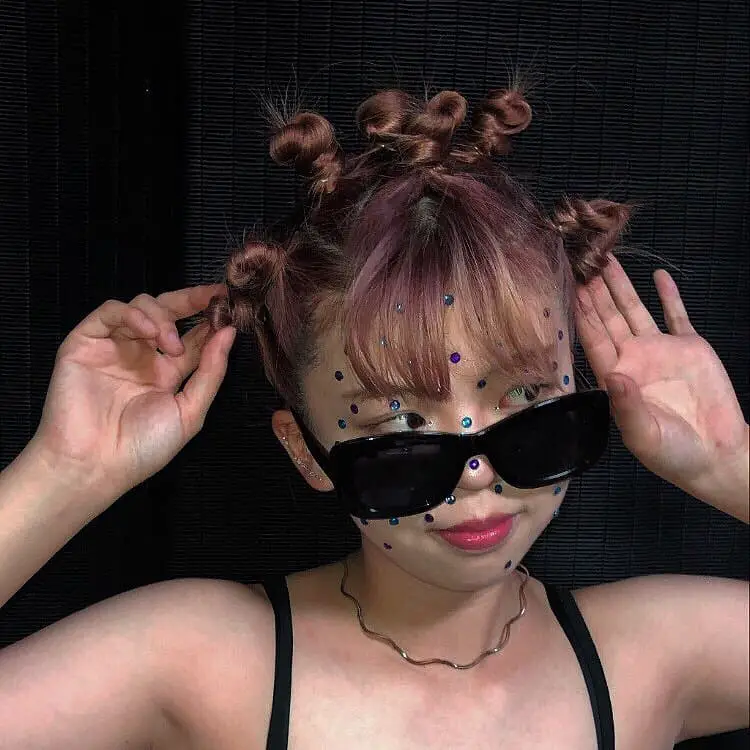
If you have very curly hair and worry that styling it wet may cause frizz, bantu knots are the solution you’ve been looking for. Apply a leave in conditioners or a moisturizing oil if you have dry curls. After you’ve massaged any products in evenly, take a section of one-inch hair and twist it around to create a tight knot. Tuck the ends under the hair to secure it.
We recommend creating about 20 knots, the smaller the knot, the tighter the curl. This protective style is becoming a popular hairstyle on its own, so you don’t have to let it out to look stunning. Check out this video or this video for advice on how to excel at this look.
Paper Towel Curls
Paper towel curls are popular with little girls, but this technique is a fantastic way to get curls on a budget. All you need is to cut each paper towel into thirds (the thicker the better), creating little strips. This is a fantastic option if you are traveling or have left your curling tools behind.
Take a small section of hair and separate it out from the rest. Take the strip of paper towel and wrap the ends of hair around it. Wrap the paper towel upwards and when you reach the top, use it to tie a knot. It may look a little poodle, but it can be brushed out.
Did you know:
When you take the paper towels out the next morning, you will notice that they are curled in the center and then flatter on the outside, so that you can tie them easily next time!
Braids for Wet Hair
Fishtail Braid
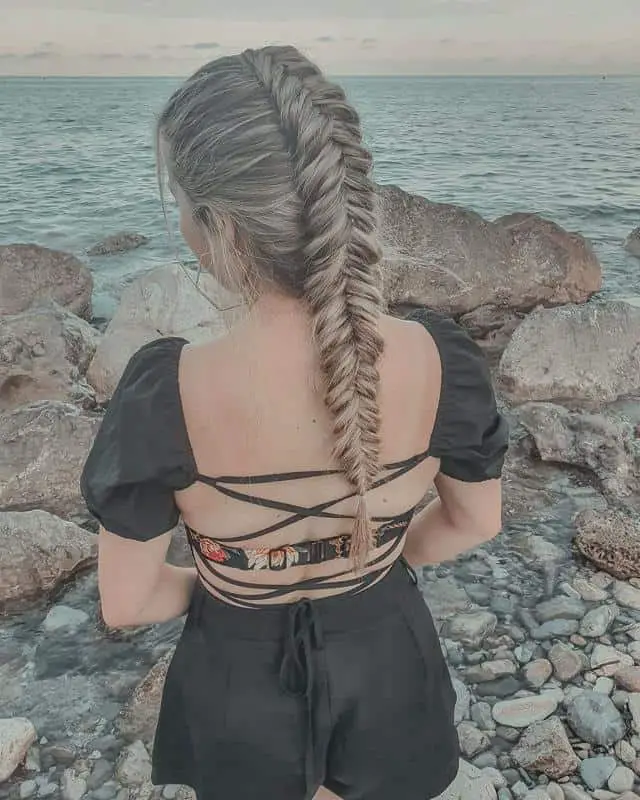
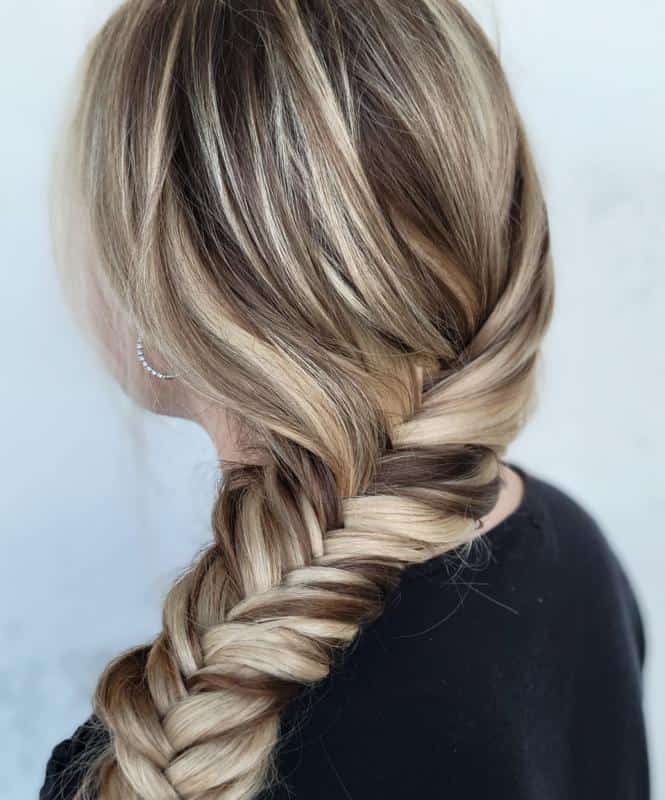
This easy but effective blend of braid and ponytail is sure to impress people. Put your hair in a high ponytail before splitting it in two sections. Hold one side in each hand to keep the sections separate. Cross a small section from the section left to the right section. Take a small piece of hair from the left side of the left ponytail and combine it with the right ponytail, then repeat from right to left.
Repeat this process through the whole ponytail. Every time, crossing a small strand of hair from one ponytail to the other, forming the fishtail braid. Tie the end and stretch it out to make the hair look fuller and thicker. This video breaks down the braid for beginners.
Did you know:
Curve your fishtail braid around to form a chic bun. Make sure you tuck the ends underneath for a sleek finish.
Dutch Braids
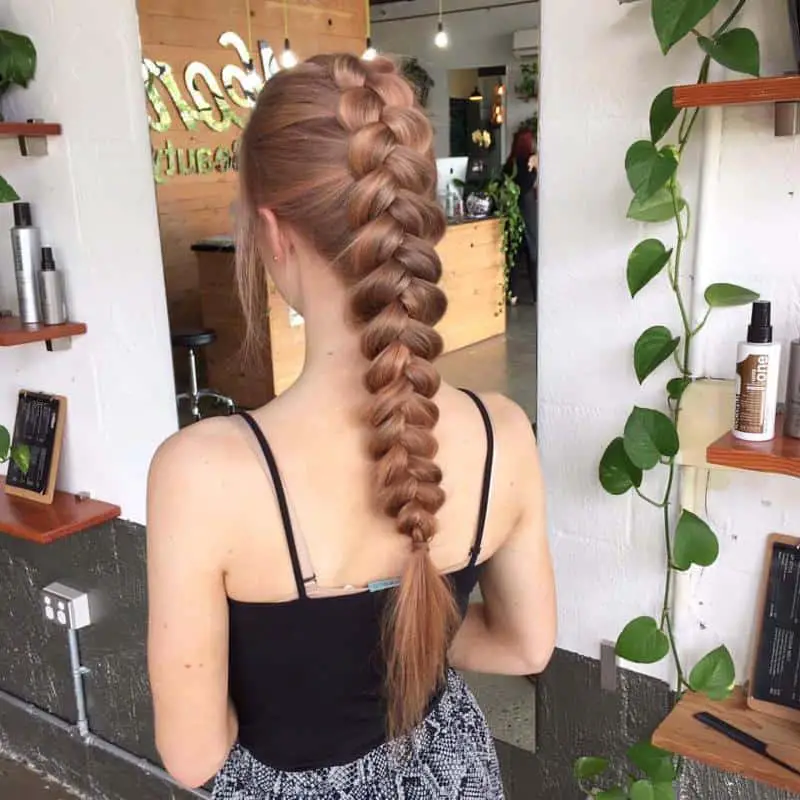
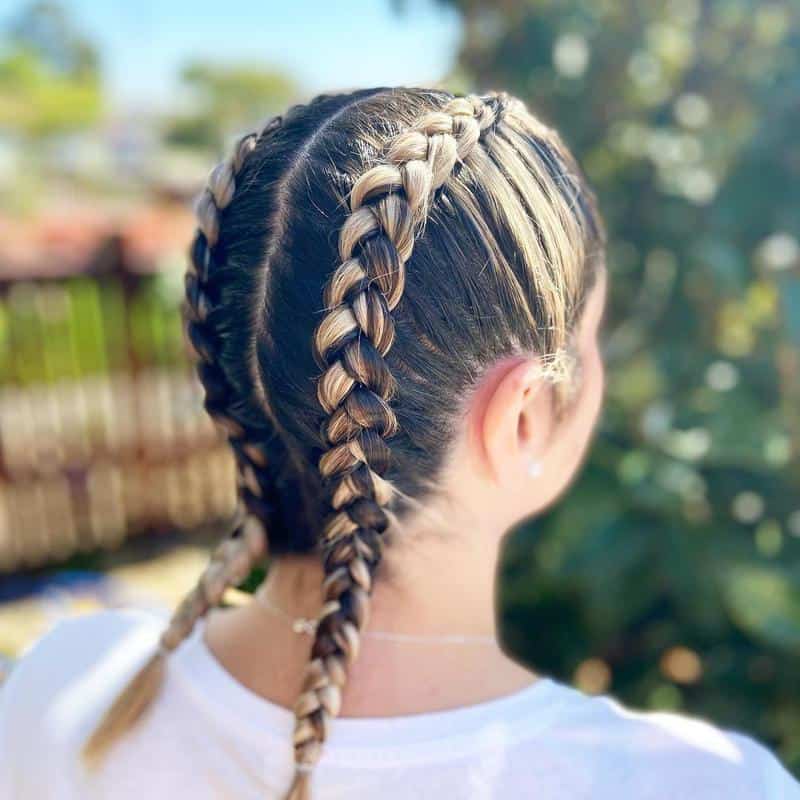
Sometimes called reverse or inside out braids, this easy hairstyle is the opposite of a French braid. It has a similar technique but instead of crossing over, you cross under. Start with a two-inch section from the parting to the ear and then split this into three equal sections. Take the left section under the middle and the right under the left.
Add a small section of hair to the middle piece and bring it under the right section. Continue braiding across the back of your head, adding in small sections as you go. Always bring the hair underneath so that your braid sits on top.
Take a slight diagonal angle with your braid from the top right of your head to the bottom left. Once you reach the end of your hair, finish in a reverse braid and secure the end of your hair with a clear elastic. This video explains it for beginners and shows you how to excel at this trendy braid.
Did you know:
If you are in a rush, add in larger sections of hair, this will speed up the braiding process.
Rope Braid
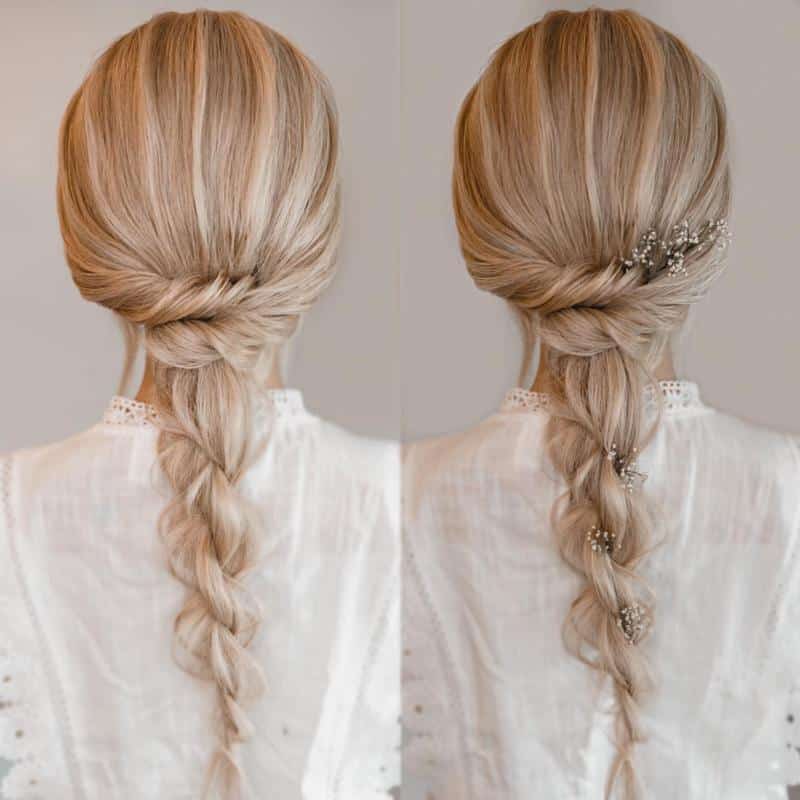
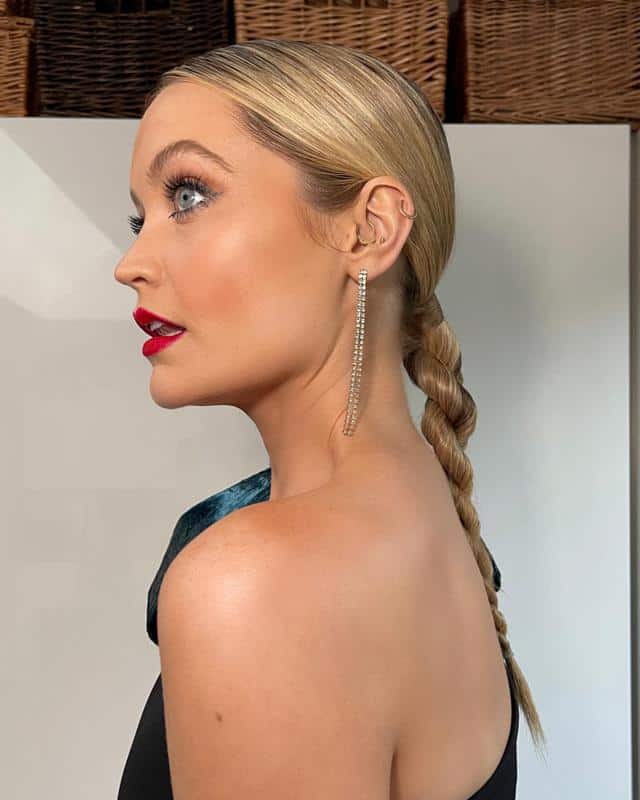
The rope braid is a hybrid between a braid and a twist because it only uses two strands of hair. Take two sections and individually twist them in opposite directions. Twist them until the end and then tie them up. The two strands being twisted will hold them together and create a natural tension.
You can gently stretch the sides of the braid to emphasize the shape and give your hair the illusion of being thicker. This video talks you through how to create a rope braid as a beginner.
French Braid
The French braid is a timeless classic that suits all occasions. This braid is easier to do on wet hair and holds better. Comb your hair so it’s smooth and pick up a large section of hair level to your ears. Split this section into three equal pieces.
Cross the left piece over the center piece, then the right over the left like a regular braid. Then add in hair from the left and combine it with the existing braid. Repeat on the right side to create a chic French braid. Continue braid down the back of your head. The larger the section, the quicker the process will be. Luxy Hair breaks down how to do a French braid.
Did you know:
The tricking to making your French braids look good is to only add 3-5 section of hair to the braid. Pick up larger pieces of hair so that all your hair is incorporated into the braid.
Wet Hair Hairstyle: FAQ
Will Styling My Hair Wet Cause Damage?
We don’t recommend doing it too frequently because wet hair is much weaker than dry hair. You can easily stretch, break, and damage your hair when it’s wet. Here are some tips on how to cause as little damage as possible to your hair when styling it wet.
- Brush before showering. Deknotting hair when it’s wet can cause damage, so it’s better to work out the tough tangles when dry.
- Don’t use any old hairbrush, you need to use the correct type of brush. Soft boar or nylon bristles bend with the hair, avoiding painful snags.
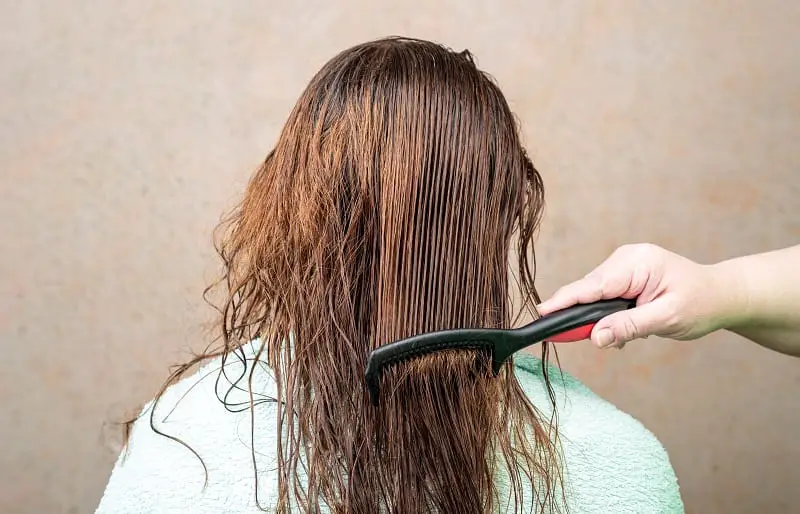
- If you do brush your wet hair, be gentle. Always start from the ends and work your way up while holding the section of hair you’re working on in your hand. Use a leave-in condition or detangler to minimize snags.
- Don’t rub your wet hair dry. Squeeze the moisture out, never rub it. Rubbing it with a towel just causes damage.
- If you are going to use hot tools, never use them on wet hair. The heat of curling tongs or straighteners will essentially boil the water on your hair. To avoid cooking your locks, only use heat tools on 100% dry hair.
- Never blow dry sopping wet hair. Towel dry or air dry a little before drying. Hair takes its shape from damp to dry, blow drying dripping wet hair will actually take longer.
- Never apply hair spray to wet hair, it will just leave it looking and feeling crunchy.
- Use seamless ponytail holders instead of rubber bands, as they cause less snagging.
What To Do With Wet Hair After A Shower?
Don’t rough up your wet hair with a turban and then tie it into a turban for your head. This will cause friction and will weaken the strands of your hair. If you want to get your hair out of your face, use a microfiber towel and carefully squeeze your hair downwards. Only twist the towel, never twist the towel. You can buy special microfiber turbans that help keep wet hair safe without causing additional damage.
Use a leave in conditioner or detangler before brushing or combing your locks. These hair products are filled with vitamins and minerals, making it easy to manage. Remember, a little goes a long way, so don’t go overboard with how much you apply.
Did you know:
Always use the product on the ends of your hair so you don’t weight down the roots and cause the roots to become greasy.
Brush your wet hair with a wide tooth comb or a wet brush, or even better your fingers! Start at the tops of your hair and then gently work up to the roots. This will avoid you ripping from top to bottom.
Did you know:
If you have the time, let your hair air dry before styling, it will help. Hair that is 30% dry will be healthier to style than wet hair.
Can I Braid My Hair When It’s Wet And Leaves It Overnight?
Yes. Braiding your hair overnight is a popular hack for getting quick curls. Although it does not give the same effects of curling or using rollers, it can help give volume to flat hair. The effect of this hack will depend on your hair texture and the type of braid you use. Experiment with different types of braids to see which works best with your hair. If you’re going to sleep with wet hair, wear a silk cap or buy a silk pillow.
Also Read: Should You Wet Your Hair Everyday? Tips Not To Ruin Your Hair

